DocuVieware Tutorial for Blazor
This tutorial focuses on the ASP.NET Core hosted version of Blazor WebAssembly. Let’s dig right in.
Create the Visual Studio Project
Make sure you have taken care of the following:
- Install DocuVieware and obtain a license key.
- Install the latest version of Visual Studio 2019 with the NET and web development workload selected (this tutorial uses version 16.6.2).
- Install the .NET Core SDK along with Visual Studio 2019. Check that you are on the latest (non-preview) version (this tutorial uses version 3.1.301). You can check your version by running this command on the command line:
dotnet –version
Create a new Blazor WebAssembly project. Make sure that the ASP.NET Core Hosted checkbox is selected.
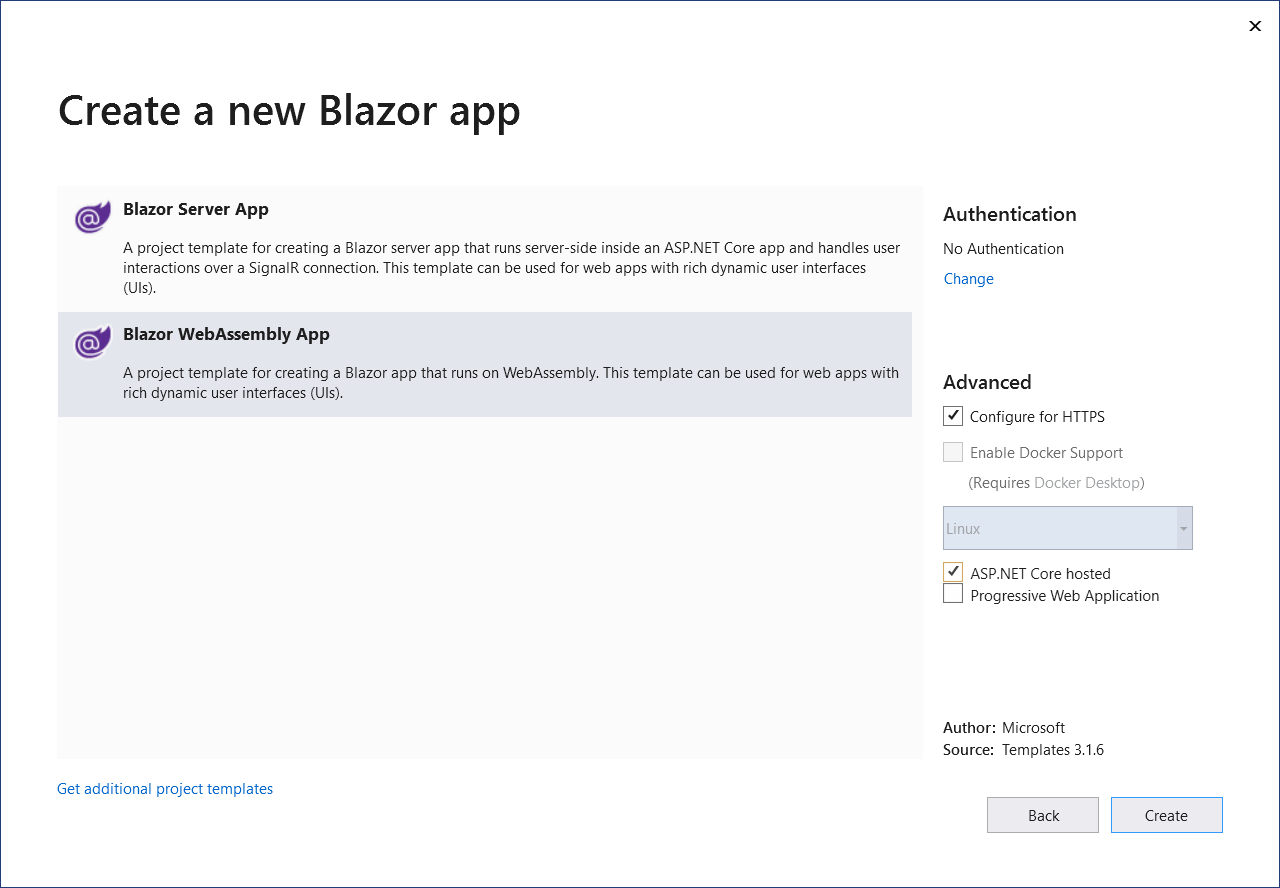
You will end up with three projects:
- A .Client project for the Blazor WebAssembly app.
- A .Server project that hosts the client app and provides controllers to expose Web API endpoints.
- A .Shared project for code and logic shared between the client and server.
You can run the app by pressing F5 and navigate to see it in action. Notice that the WeatherForecast class is used on the server in WeatherForecastController, and the client in the FetchData Razor component.
Set Up DocuVieware
Now let’s set up DocuVieware on the server. In the server application, right-click Dependencies in the Solution Explorer and select Add COM Reference. Click Browse and navigate to the redistribution folder for ASP.NET Core 3. On most systems, the path is:
C:\GdPicture.NET 14\Redist\DocuVieware (.NET Core 3.0)
Select the DLL (GdPicture.NET.14.WEB.DocuVieware.Core.dll), then click Add and confirm. The DLL will show up under Dependencies > Assemblies. Select it in the Solution Explorer and set the Copy Local property to Yes.
Next, add the related dependencies. Right-click the server project and select Add > Existing Item. Navigate to the root of the redistribution directory (C:\GdPicture.NET 14\Redist) and select the following DLLs (select the correct versions for your execution environment):
- NET.14.filters.dll (for 32-bit)
- NET.14.filters.64.dll (for 64-bit)
- NET.14.image.gdimgplug.dll (for 32-bit)
- NET.14.image.gdimgplug.64.dll (for 64-bit)
- NET.14.Imaging.Rendering.Skia.dll (for 32-bit)
- NET.14.Imaging.Rendering.Skia.64.dll (for 64-bit)
- NET.14.jbig2.encoder.dll (for 32-bit)
- NET.14.jbig2.encoder.64.dll (for 64-bit)
Add the files, then select them all in the Solution Explorer and set their Build Action to Content and Copy to Output Directory to Copy Always.
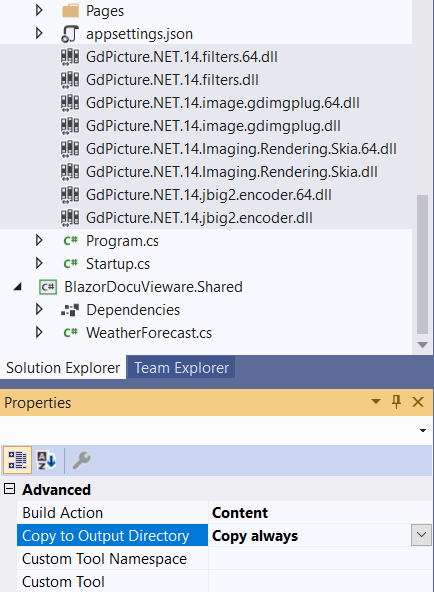 Figure 2: Setting build and copy properties
Activate DocuVieware
To activate DocuVieware, open the Startup.cs file in the server project. Add the following statements:
using GdPicture14.WEB;
using System.Reflection;

In the ConfigureServices method, append the following code to the end of the method:

var assemblyPath = Assembly.GetExecutingAssembly().Location;
var path = System.IO.Path.GetDirectoryName(assemblyPath);
DocuViewareLicensing.RegisterKEY("your key");
DocuViewareManager.SetupConfiguration(true, DocuViewareSessionStateMode.InProc,
    path + "\\Cache",
    "https://localhost:44370/", "api/DocuViewareREST");
Substitute “your key” with your product key (a long number). The cache will be created in the executing directory.
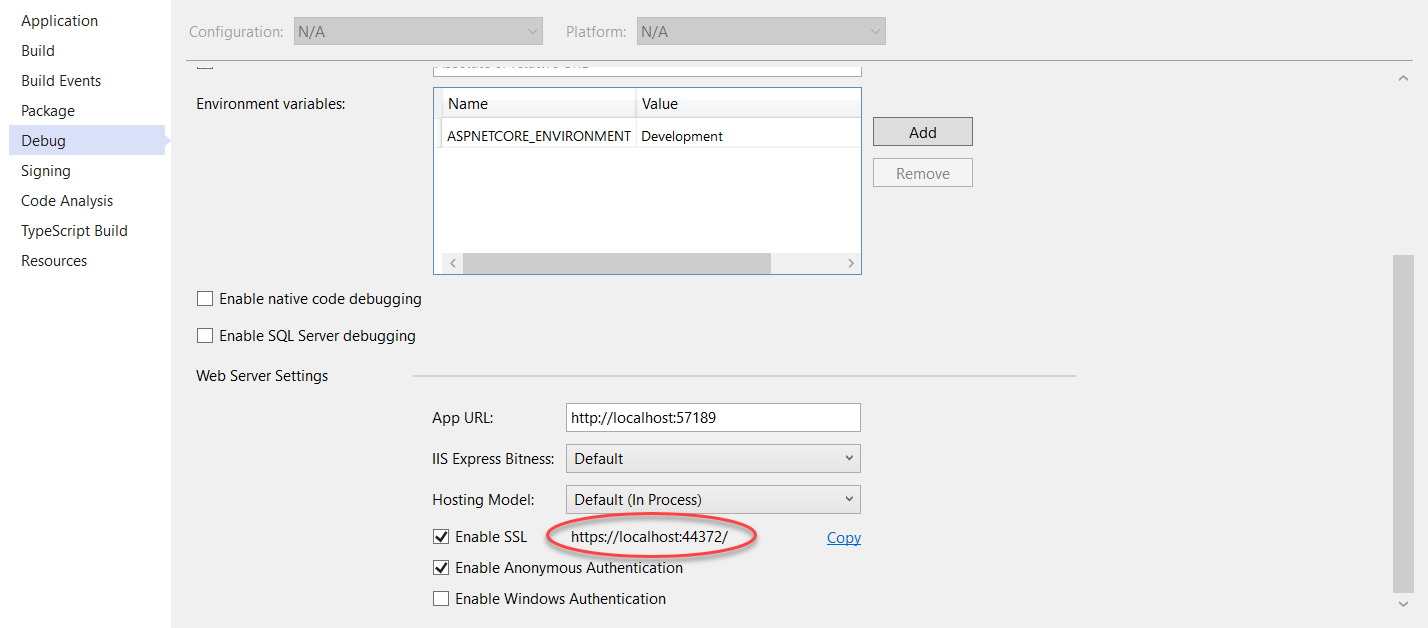
The path to the application may need to be updated with a different port number. To obtain it, you can run the application and copy it from the browser URL. Alternatively, you can right-click the server project, select Properties, navigate to the Debug tab, and copy the HTTPS URL.
Configure the DocuVieware Controller
The example application supports configuration of the DocuVieware control options. In the shared project, add a class named DocuViewareConfiguration. Define the following properties:
public class DocuViewareConfiguration
{
    public string SessionId { get; set; }
    public string ControlId { get; set; }
    public bool AllowPrint { get; set; }
    public bool EnablePrintButton { get; set; }
    public bool AllowUpload { get; set; }
    public bool EnableFileUploadButton { get; set; }
    public bool CollapsedSnapIn { get; set; }
    public bool ShowAnnotationsSnapIn { get; set; }
    public bool EnableRotateButtons { get; set; }
    public bool EnableZoomButtons { get; set; }
    public bool EnablePageViewButtons { get; set; }
    public bool EnableMultipleThumbnailSelection { get; set; }
    public bool EnableMouseModeButtons { get; set; }
    public bool EnableFormFieldsEdition { get; set; }
    public bool EnableTwainAcquisitionButton { get; set; }
}
Add another class to the same project, named DocuViewareRESTOutputResponse:
public class DocuViewareRESTOutputResponse
{
    public string HtmlContent { get; set; }
}
Next, right-click the Controllers folder and select Add … Controller. Pick “API Controller – Empty” and click Add. Name the controller DocuViewareRESTController.
The first controller method you add receives a copy of the configuration and returns the HTML5 markup necessary to render the control on the client. Start by adding the following statements at the top of the controller:
using System.IO;
using System.Net;
using System.Net.Http;
using BlazorDocuVieware.Shared;
using GdPicture14.WEB;
The first controller method receives two distinct identifiers from the configuration: one for the user session, and one for the control. These are necessary because DocuVieware keeps track of the control’s state on the server.
[HttpPost]
[Route("GetDocuViewareControl")]
public IActionResult GetDocuViewareControl([FromBody] DocuViewareConfiguration controlConfiguration)
{
    if (!DocuViewareManager.IsSessionAlive(controlConfiguration.SessionId))
    {
        if (!string.IsNullOrEmpty(controlConfiguration.SessionId) && !string.IsNullOrEmpty(controlConfiguration.ControlId))
        {
            DocuViewareManager.CreateDocuViewareSession(controlConfiguration.SessionId,
                controlConfiguration.ControlId, 20);
        }
        else
        {
            throw new Exception("Invalid session identifier and/or invalid control identifier.");
        }
    }
    using var docuVieware = new DocuViewareControl(controlConfiguration.SessionId)
    {
        AllowPrint = controlConfiguration.AllowPrint,
        EnablePrintButton = controlConfiguration.EnablePrintButton,
        AllowUpload = controlConfiguration.AllowUpload,
        EnableFileUploadButton = controlConfiguration.EnableFileUploadButton,
        CollapsedSnapIn = controlConfiguration.CollapsedSnapIn,
        ShowAnnotationsSnapIn = controlConfiguration.ShowAnnotationsSnapIn,
        EnableRotateButtons = controlConfiguration.EnableRotateButtons,
        EnableZoomButtons = controlConfiguration.EnableZoomButtons,
        EnablePageViewButtons = controlConfiguration.EnablePageViewButtons,
        EnableMultipleThumbnailSelection = controlConfiguration.EnableMultipleThumbnailSelection,
        EnableMouseModeButtons = controlConfiguration.EnableMouseModeButtons,
        EnableFormFieldsEdition = controlConfiguration.EnableFormFieldsEdition,
        EnableTwainAcquisitionButton = controlConfiguration.EnableTwainAcquisitionButton,
        MaxUploadSize = 36700160 // 35MB
    };
    using StringWriter controlOutput = new StringWriter();
    docuVieware.RenderControl(controlOutput);
    return new OkObjectResult(new DocuViewareRESTOutputResponse
    {
        HtmlContent = controlOutput.ToString()
    });
}
Next, copy the DocuVieware integration methods from the ASP.NET Core tutorial and paste them into your file. Do not copy the entire controller code, just the methods starting with [HttpGet(“ping”)] and ending with the [HttpPost(“digisign”)] method.
The server setup is now complete!
Prepare the Blazor WebAssembly Client
Right-click the client project and add a class named SessionService. This will track a unique GUID and session ID (part of the GUID) for the logged in user. Keeping track of these values enables the DocuVieware service to maintain state when the user navigates to other pages.
public class SessionService
{
    public SessionService()
    {
        SessionId = Guid.NewGuid().ToString();
        Key = SessionId.Split("-")[^1];
    }
    public string SessionId { get; }
    public string Key { get; }
}
Register the service in Program.cs after the existing builder.Services.AddTransient line of code:
builder.Services.AddSingleton<SessionService>();
Next, open the Index.razor page. Delete everything that was generated from the template and replace it with the following:
@page "/"
@inject HttpClient Client
@inject IJSRuntime Runtime
@inject SessionService Service

@using BlazorDocuVieware.Shared
@using System.Net.Http;
The inject statements receive a copy of an HTTP client for making web API calls, an instance of the JavaScript runtime for interoperability, and the session service. Add a <div> element to host the control. The @ref statement allows you to reference the element from code.
<div @ref="docuDiv" style="width:1200px;height:1000px;"></div>
Finally, add the @code block that loads the control from the server when the component is initialized.
@code {
        ElementReference docuDiv;

        protected override async Task OnInitializedAsync()
        {
            var docuViewareConfig = new DocuViewareConfiguration
            {
                SessionId = Service.SessionId,
                ControlId = $"DocuVieware{Service.Key}",
                AllowPrint = true,
                EnablePrintButton = true,
                AllowUpload = true,
                EnableFileUploadButton = true,
                CollapsedSnapIn = true,
                ShowAnnotationsSnapIn = true,
                EnableRotateButtons = true,
                EnableZoomButtons = true,
                EnablePageViewButtons = true,
                EnableMultipleThumbnailSelection = true,
                EnableMouseModeButtons = true,
                EnableFormFieldsEdition = true,
                EnableTwainAcquisitionButton = true
            };
            var response = await Client.PostAsJsonAsync("api/DocuViewareREST/GetDocuViewareControl", docuViewareConfig);
            var responseContent = await response.Content.ReadFromJsonAsync<DocuViewareRESTOutputResponse>();
            await Runtime.InvokeVoidAsync("docuViewareShim.loadControl",
                new[]
                {
                    (object)docuDiv, (object)responseContent.HtmlContent
                        });
        }
    }
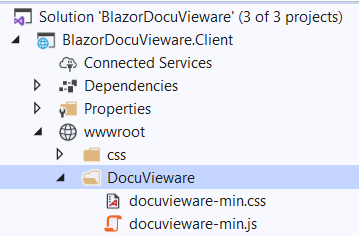
After the control is fetched from the server, the HTML content must be inserted into the DOM. This is done via JavaScript. Under wwwroot in the client project, add a new folder named DocuVieware. Copy the stylesheet and JavaScript file from the resources folder (C:\GdPicture.NET14\Redist\DocuVieware (Resources)) and paste them into the new folder. There should be two files.
Right-click the DocuVieware folder and add a new JavaScript file. Name it shim.js and populate it with the following code:
window.docuViewareShim = {
        loadControl: (target, html) => {
            $(target).html(html);
        }
    };
This code retrieves the HTML content from the Web API call and injects it into the <div> element.
Open the index.html file under wwwroot. After the app.css stylesheet, add the DocuVieware stylesheet:
<link href="DocuVieware/docuvieware-min.css" rel="stylesheet"/>
After the <script> tag that references blazor.webassembly.js, add the following script tags:
<script src="https://ajax.googleapis.com/ajax/libs/jquery/3.1.1/jquery.min.js"></script>
<script src="DocuVieware/docuvieware-min.js"></script>
<script src="DocuVieware/shim.js"></script>
Due to security concerns, by default, plain JavaScript does not allow injecting dynamic content with script tags into existing elements. Fortunately, jQuery provides an html() method that works around this restriction. This is what the loadControl JavaScript method uses.
Start Manipulating Documents
You are now ready to hit F5 and start working with documents. I tested the app by loading a picture of a beautiful sunset. I used the annotation tools to write “Wow” and have the annotation highlighted.
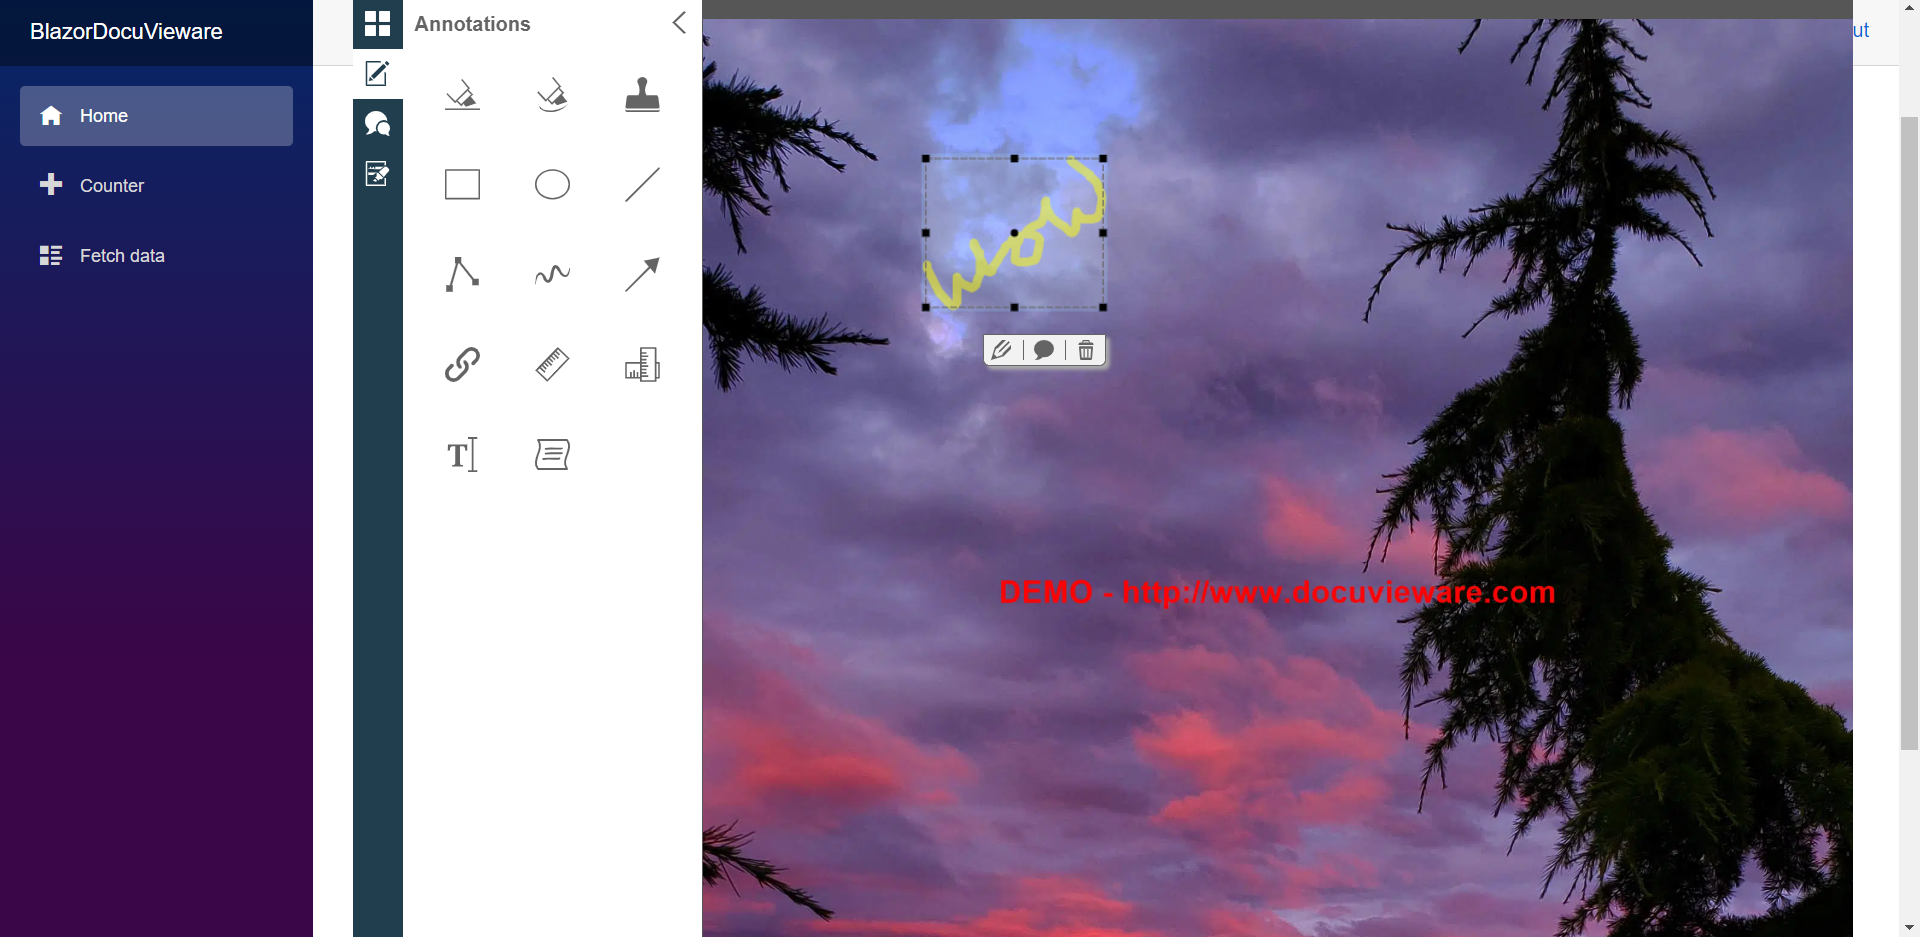
Because the server keeps track of the control, you can click the Counter and Fetch data options, and then return to the Home view to pick up where you left off.
With DocuVieware successfully integrated into your Blazor app, you can move on to advanced features, such as:
- Add a custom action to draw a QR Code on a document.
- Manipulate the current selection to show coordinates, clear selection, or apply a negative filter.
- Build a custom snap-in that creates a button to trigger a custom action, which returns a message from the server.
Wrapping Up
This integration allowed you to load documents of virtually any format, annotate them, manipulate them, and so on. Finally, you had a peek into the various ways of extending and customizing the control’s functionality.
Download the DocuVieware trial version, get your trial product key, and get busy building the next generation of web apps.